
|
| VI Report 6 - 3/4/01 |
|
I know, I know, "Jon... It has only been one day. Do SEVERAL things THEN post an update." My website, post as much as I like :p This update actually just focuses on my Hella Switch that I converted to a removable key (with the circuit closed) today. Here's the switch before: |
 |
Allow me to elaborate. The Hella switch I purchased will not stay "On" unless the key is left in the switch. I wanted to be able to put the key in, turn it, then remove the key and the circuit stay closed so I modified the switch and key. The first step I took was to cut the key into two parts (yikes! no turning back now!). I made the cut where it enters the switch housing. |
 |
Afterwards I used my dremel to smooth the edges around the plastic (some hard plastic at that). Next stop, drill press. |
 |
I drilled a hole through the center of the piece that fits into the switch housing (old bottom of the key). It's hard to tell in this image, but I screwed a #15 torx head screw into the hole till the head was flush with the top of the plastic (tight fit too, it's secure). |
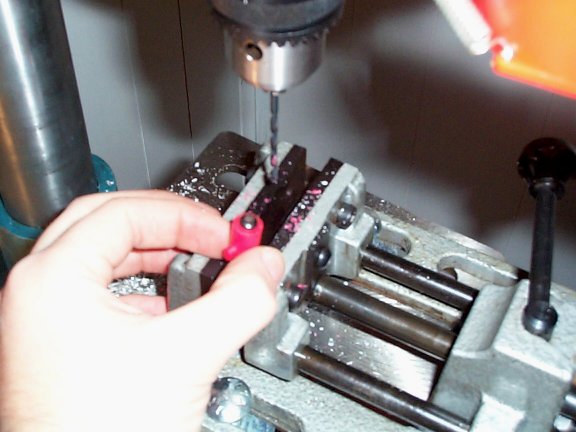 |
Here's a shot of me making a starter hole in the top part of the key. |
 |
Followed by a larger bore to accommodate the #15 torx bit the key top would house. |
 |
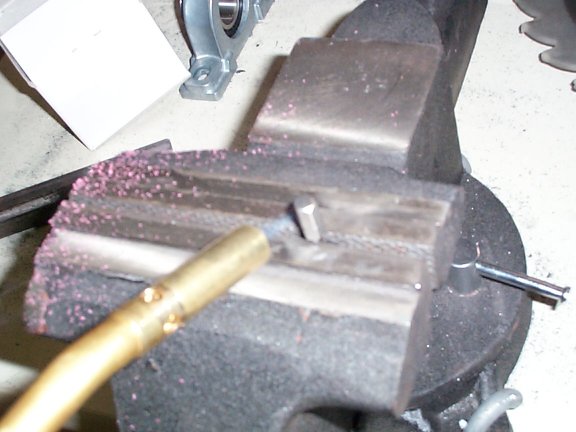
Flame on! I clamped the torx bit upside down in the vise and used a propane torch to heat it till it was red. Then CAREFULLY pushed the hollowed out key top down onto the bit leaving the torx head exposed. |
 |
Here's a shot of the new key after the torx bit cooled down. I didn't get it as straight as I wanted so I reheated the tip on the bit and corrected the alignment. |
 |
Much better :) After I took this shot, I dremeled it a little to clean it up and put some heat shrink over the front (melted plastic is ugly). |
 |
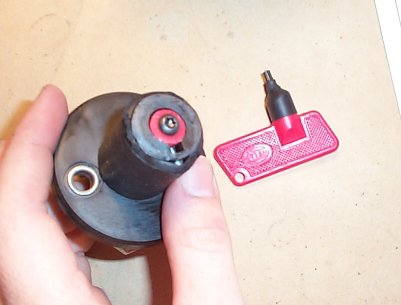
A shot of the bottom part of the old key in place and the new, freshly "heat-shrunk", key on the counter. |
 |
It works! :) |
 |
Now let's make it so the old key bottom doesn't fall out of the switch body when in the "Off" position. I drilled two very small holes through the keyed side of the switch housing. I had two phillips head screws that fit perfectly in the holes. |
 |
Everything felt secure, but I wanted to make SURE the screws couldn't come out. It really shouldn't happen anyway, they do nothing to hold the insert in place when the switch is in the "on" position. But I like overkill :) I had some cold shrink that matched the outer diameter of the switch perfectly. Here's a shot of the stuff before I put it on: |
 |
An image before I trimmed all the excess cold shrink off: |
 |
Finally, hella finished with the Hella Switch. It works perfectly too! Sorry about being so long winded, I just figured a step-by-step might be helpful for someone trying to accomplish the same goal with one of these hella cool switches ;) Note: I will lay off the "hella" puns for a while, I just couldn't help myself doing a whole hella Hella update :p |
 |